

How Shower Waterproofing Works (And Why It Fails)
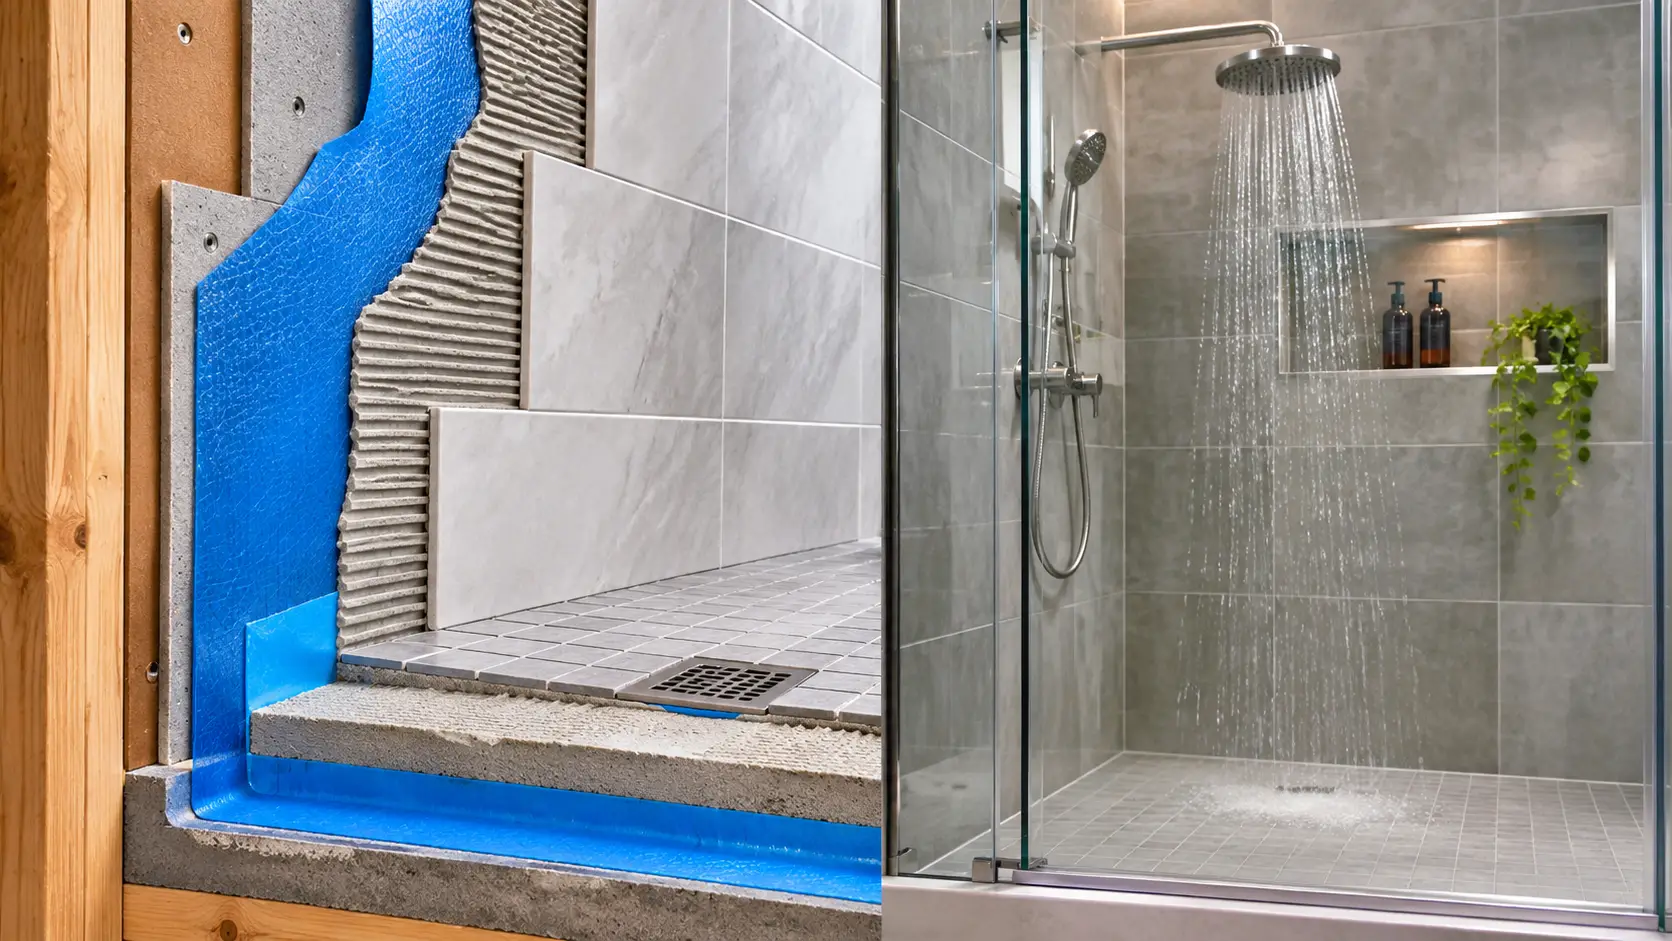
A tiled shower looks like it is made of tile. It is not. It is made of a layer you will never see, buried under the tile, grout and mortar, that has one job: keep water from reaching the wood. When that layer is right, a shower lasts decades. When it is wrong, everything on the surface can look perfect for years while the damage grows underneath.
This guide explains how shower waterproofing actually works, the main systems, the places that fail, how installers test the work, and what to ask before anyone sets a tile. Sources were checked in November 2026.
Quick answer
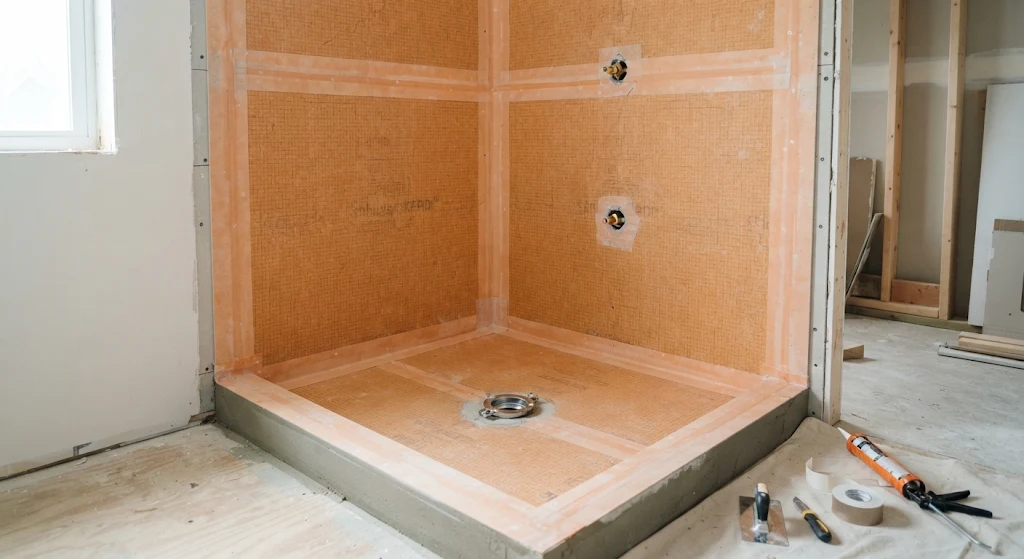
Tile and grout are not waterproof, because water passes through grout joints. The waterproofing is a membrane behind the tile: a sheet membrane, a liquid-applied coating, a traditional pan liner under a mortar bed, or a foam panel system that is sealed with a membrane. The industry standard for bonded membranes is ANSI A118.10, as described by Construction Canada. Most failures come from a few repeat mistakes: punctured liners, thin or missed spots in liquid coatings, poor drain connections, unsealed corners and penetrations, and skipping the flood test.
The layers behind your tile
Think of the shower as a stack. From the inside out, you see tile and grout. Behind them is a layer of thin-set mortar, then the waterproofing membrane, then a substrate such as cement board, foam board or a mortar bed, and then the framing and subfloor.
| Layer | Job | Waterproof? |
|---|---|---|
| Tile | Wear surface and looks | No. Glazed tile resists water, but the joints do not |
| Grout | Fills joints between tile | No. It is porous or can crack, and water passes through |
| Thin-set mortar | Bonds tile to the surface below | No, though it is not a water barrier |
| Waterproofing membrane | Stops water from reaching the substrate | Yes, this is the real barrier |
| Substrate (cement board, foam board, mortar bed) | Flat, stable base for the layers above | Not by itself. Cement board alone is not waterproof |
| Framing and subfloor | Structure | No, and this is what you are protecting |
That last point matters. a shower waterproofing guide notes that inspectors and remodelers who open old showers often find drywall or green board in wet zones, cement board with no membrane, or polyethylene that stops short of the tub flange, and every one of those leaves a path for water. Moisture control is also why waterproofing has a standards system. According to Construction Canada, ANSI A118.10 sets requirements for load-bearing, bonded, waterproof membranes for tile, whether trowel-applied, liquid or sheet.
The main waterproofing methods
There are four common approaches, and good installers sometimes combine them. GBD Magazine summarizes three product families used for shower bases, sheet membrane, liquid-applied membrane and foam board, and notes they can usually be combined in the same shower.
| Method | How it works | Strengths | Watch for |
|---|---|---|---|
| Traditional mud bed with pan liner | A sloped mortar bed, a flexible liner clamped into a two-part drain, then a second mortar bed for tile | Time-tested, custom shapes | Liner must be folded, not cut, at corners, and nothing can puncture it. Construction Canada says most failures today are in traditional mortar-bed installations |
| Bonded sheet membrane (such as Schluter or Ardex products) | Factory-made sheet bonded with thin-set over a sloped base and walls | Uniform thickness, crack isolation | Seams need overlap and band, and corners need preformed pieces |
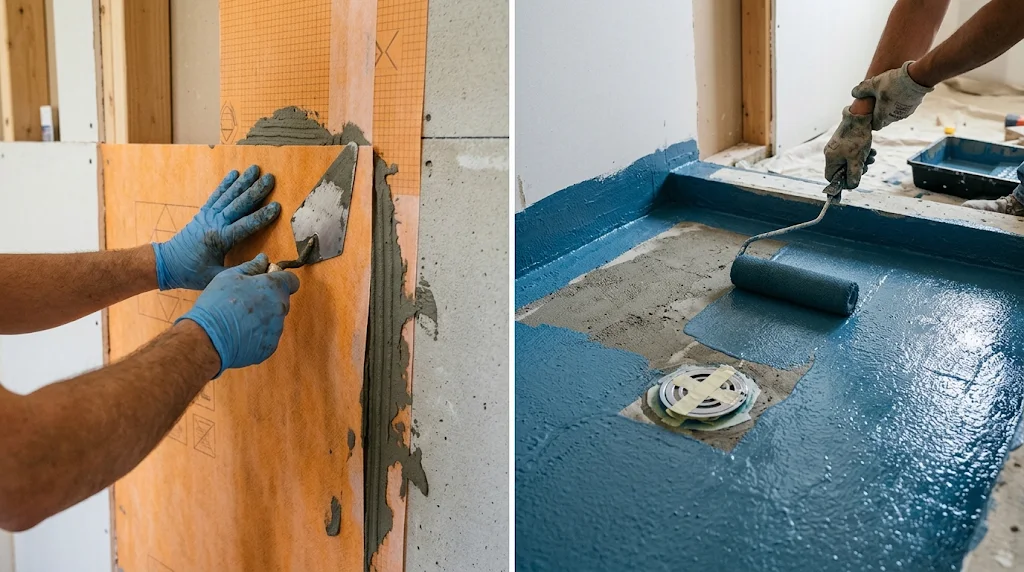
| Liquid-applied membrane | Brushed or rolled coatings that cure into a film | Wraps benches and niches easily | Thickness depends on the installer, and thin spots and pinholes can hide. Needs cure time before tile |
| Foam board and panel systems | Pre-sloped foam trays and wall panels, sealed at seams | Quick, lightweight | Most still need an added layer of liquid or fabric waterproofing, and they cost more |
Fine Homebuilding calls bonded sheet membrane the highest level of waterproofing, durability and crack isolation, and describes liquid-applied membrane as convenient and often best as part of a combined approach. That is one expert’s view, and the manufacturer instructions for whichever product you use have the final word. Also worth knowing from Floor Trends: starting in 2024, the ANSI A118.10 standard lets specifiers call for liquid-applied (L) or sheet-applied (S) membranes by designation.
The drain and the shower floor
The floor is where most of the water goes, so it is the most critical part. Schluter explains that a traditional shower places a pan liner over a pre-sloped mortar bed and clamps it into a two-part drain with weep holes. The liner can be PVC, CPE, copper or lead. Weep holes let any water that gets under the tile drain out, so they must stay clear. A modern bonded system instead slopes the base, puts the membrane on the surface and connects it to a drain with a bonding flange, so water is directed into the top of the drain.
- Slope matters. The floor should drain toward the drain without ponding, typically about 1/4 inch per foot.
- In a liner system, the weep holes must not be blocked by mortar or sealant.
- In a bonded system, the membrane has to be sealed to the drain flange with no gaps.
- Follow the manufacturer instructions for the drain. An ICC-ES evaluation report for a Mapei membrane, for example, calls for sealant around the drain flange throat, with no voids, before the collar is bolted down.
Walls, corners, niches and penetrations
Walls can be waterproofed too, and where they are, the membrane should connect with the floor. Schluter notes that with its system, the sheet membrane goes on the walls and overlaps the floor-to-wall transition. The weak points are the places where something interrupts the flat surface.
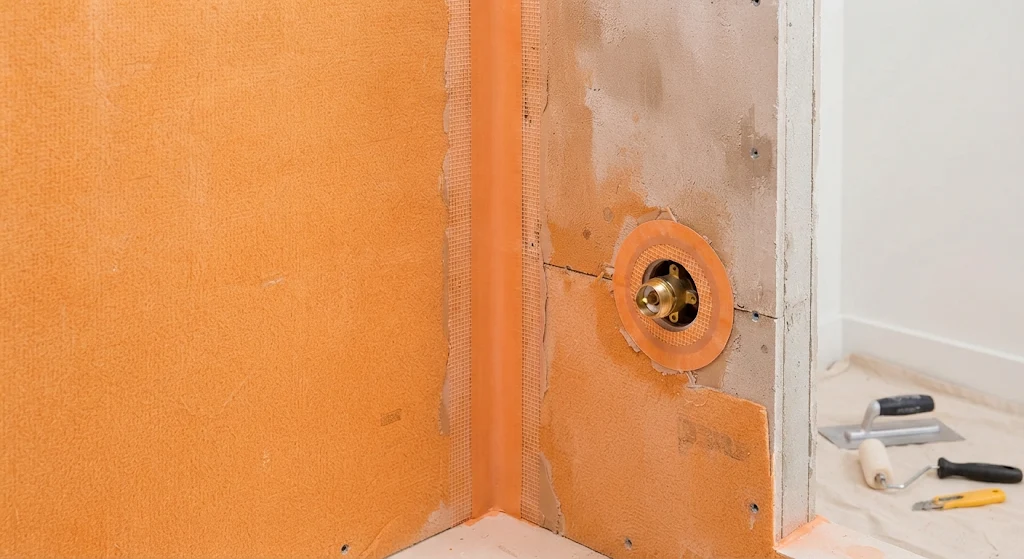
- Inside corners and seams. a shower waterproofing guide says most systems call for fabric tape or mesh embedded in the coating at board seams, inside corners and transitions to the tub or pan.
- Valve and showerhead penetrations. Every hole in the membrane needs a sealed collar or gasket.
- Niches and benches. These are complicated shapes with many corners, so careful detailing matters. Prebuilt niches can reduce the number of seams.
- Curbs and door jambs. In liner systems, preformed dam corners are used at the curb ends instead of cutting and gluing the liner, according to GBD and Construction Canada.
If you are planning a curbless design, the waterproofing covers a larger area and the slope is more critical. For design details, see pan and curbless design details.
Testing and cure times
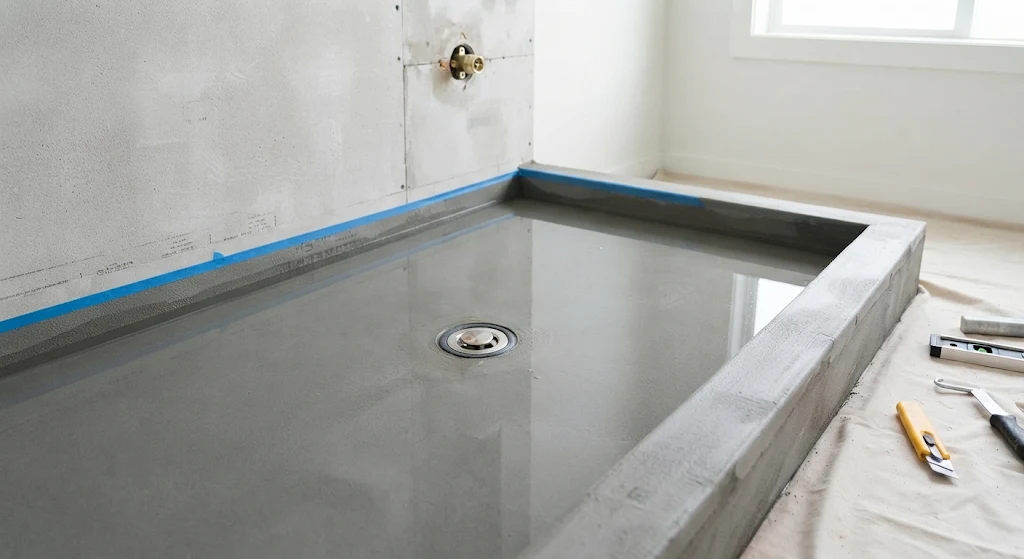
A flood test is the cheapest insurance in the whole job. The idea is simple: plug the drain, fill the floor with water, mark the level, and watch. If the level drops, there is a leak, and it is much easier to fix before the tile is set. a shower waterproofing guide says the details vary by jurisdiction and manufacturer, including water depth, duration and whether an inspector must witness it. The Ardex technical bulletin for its membranes says a flood test should run for a minimum of 24 hours.
Cure times matter too. The Schluter FAQ says its installers should wait 24 hours after completing the membrane before water testing and tile installation, while the Ardex bulletin says some of its liquid membranes need up to 72 hours to cure before testing. Liquid products also depend on thickness. Construction Canada says a wet film thickness gauge is the best way to verify correct dry coverage, and the minimum thickness is set by the manufacturer. Check your own product’s data sheet, because the numbers differ.
Why the waiting is not wasted time
Every rushed step in a shower is a hidden step. A membrane that has not cured can be damaged by the next layer. A flood test that is skipped gives you no proof. The waits are part of the schedule, not delays.
Why showers fail
Nearly every shower failure traces back to a handful of causes. The table combines the sources cited above.
| Failure | What happens | How to prevent it |
|---|---|---|
| Liner corners cut and glued | The glued seam leaks | Fold the liner, or use preformed dam corners |
| Nails or screws through the liner | Even small holes can leak into the wall | Keep fasteners above the liner’s required height, and seal any penetration |
| Blocked weep holes | Water trapped under the tile cannot drain | Keep the weep holes clear of mortar or sealant |
| Thin spots or pinholes in liquid coatings | Water reaches the substrate | Use a wet film gauge and apply the manufacturer’s coats and thickness |
| Unsealed corners, seams and penetrations | Water enters at the weak points | Embed tape or use preformed corners, and seal valves and showerheads |
| Poor drain connection | Water bypasses the membrane at the drain | Seal the drain flange without voids and follow the instructions |
| No waterproofing behind tile, only cement board or drywall | Water soaks through to wood | Install a proper membrane system |
| Skipped flood test | Leaks go unnoticed until the tile is set | Flood test the floor before tile and repair any leak |
| Failed caulk or movement joints | Gaps let water behind the tile | Use flexible sealant in corners and inspect it twice a year |
| Aging | Old liners and sealants degrade | Inspect and replace sealant, and know the age of the shower |
Construction Canada adds that apart from deterioration over time and failing to flood test, most shower failures today are in traditional mortar-bed installations, which is why the details on liners and drains matter so much. For the surface side of the story, see how caulk and grout fit in, since a gap there can let water get behind the tile.
Signs your shower may be leaking
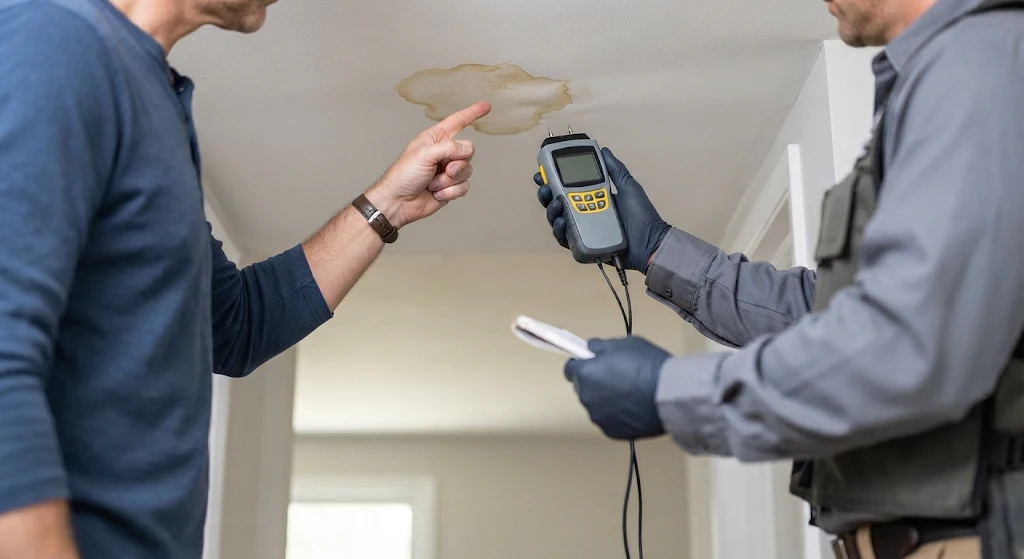
- ☐Stains or bubbling paint on the ceiling below the shower, or on walls near it.
- ☐Soft, bouncy or discolored flooring around the shower.
- ☐A persistent musty smell, or mold at baseboards or the lower wall outside the shower.
- ☐Loose, hollow-sounding or cracked tiles, or grout that keeps cracking in the same spot.
- ☐Water stains or efflorescence, a white powdery deposit, on tile or grout.
- ☐Damp drywall or a swollen door casing next to the shower.
- ☐A slow drain with water pooling on the floor, which can signal poor slope or a drain problem.
One sign alone does not prove a leak, and surface condensation or a spilled bath can cause some of these. But several together, or a stain that grows, is a reason to have it checked. A plumber or a tile pro can use a moisture meter and, if needed, a flood test or a camera.
Questions to ask your installer
- ☐Which waterproofing system will you use, and who is the manufacturer?
- ☐Will you follow the manufacturer’s written instructions for the whole assembly, including the drain and the cure times?
- ☐Will you flood test the floor before tile, and for how long?
- ☐How will you seal the corners, seams, niche and valve penetrations?
- ☐For liquid products, how will you check the thickness?
- ☐What is under the tile on my shower walls: cement board, foam board, or something else?
- ☐Is the waterproofing covered by a warranty, and what does it say?
- ☐Can I see photos of the membrane before the tile goes on?
Good installers welcome these questions. For general help on what to look for in a contractor, there are more homeowner answers in the leak and repair questions section, and the waterproofing and tile installation help page lists the related trades.
What waterproofing costs
Waterproofing is a small share of the budget for its importance. This Old House lists backer board and a waterproofing system at about $800 to $1,500 for a typical tiled shower. On a midrange shower budgeted at $8,000 to $13,000, that is roughly 6 to 19 percent of the total, which is my own arithmetic. A leak behind finished tile, on the other hand, means removing the tile and rebuilding. That is why it is the last place to cut costs. For a bigger budget picture, see budget guidance for shower projects.
Frequently asked questions
Is tile waterproof?
Tile itself resists water, but a tiled shower is not waterproof, because water passes through grout joints and cracks. The waterproofing layer behind the tile is what protects the wall and floor.
Is cement board waterproof?
Cement board does not rot, but it is not a waterproof barrier by itself. Water can pass through it, so it needs a membrane or a system designed to waterproof it.
What is the best shower waterproofing method?
There is no single answer. Fine Homebuilding calls bonded sheet membrane the highest level of waterproofing, and liquid-applied products work well when applied carefully. The best method is the one installed correctly, tested and matched to the shower design.
How long does a shower membrane last?
Properly installed membranes can last as long as the shower, though sealants and grout need periodic maintenance. Lifespan depends on the product, the installation and how well the surface is cared for.
How do you test shower waterproofing?
With a flood test: plug the drain, fill the floor with water, mark the level and check it after the time the manufacturer or code requires. One manufacturer specifies at least 24 hours.
Can I fix a leaking shower without removing the tile?
Sometimes small surface problems, such as failed caulk or a cracked grout line, can be repaired. A leak in the membrane usually means removing the tile, because the membrane is behind it. A professional can tell which you have. This is general information, not advice for your specific shower.
Final thoughts
Shower waterproofing is the most important part of a tiled shower that nobody sees. The materials are not exotic and the cost is modest, but every step has to be right: the membrane, the drain connection, the corners and the test.
If you remember one thing, make it this: ask what is behind your tile, and ask whether it will be flood tested. Those two questions filter out most of the risk. If you want to check availability before asking for a visit, see the communities on the coverage list. Sources checked November 2026.
Want your shower built to last?
Tell Reliable Bathroom Remodeling about your shower and ask for a free estimate. Ask which waterproofing system is included, and ask for the flood test and the schedule in writing.