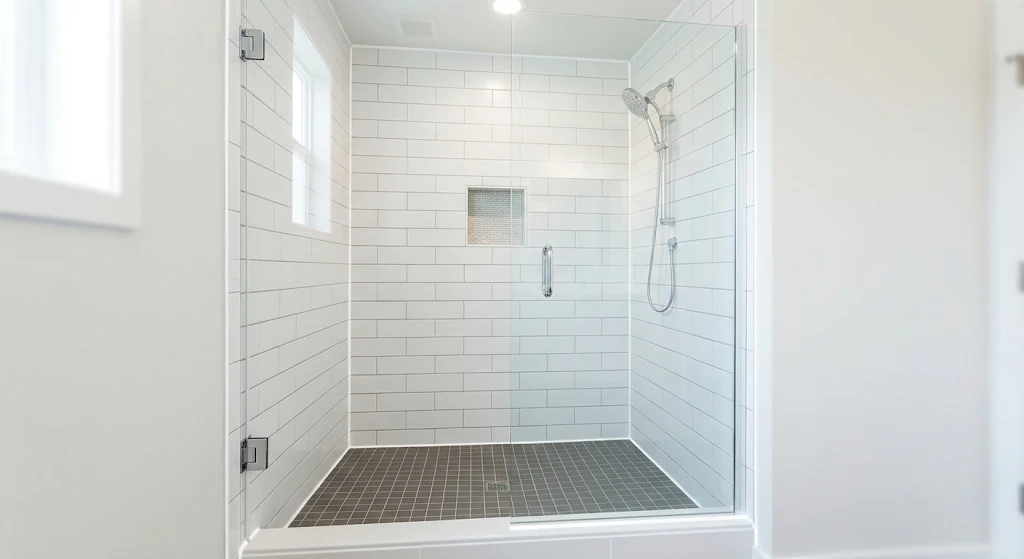

Bathroom Grout vs. Caulk: Where Each Belongs and How to Prevent Leaks
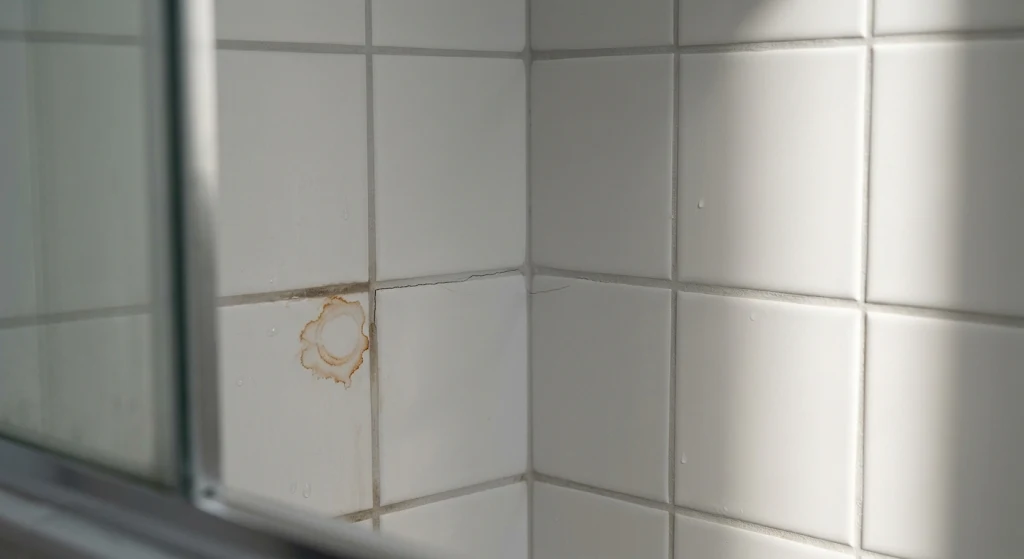
It starts as a hairline crack in the shower corner. A few months later the grout there is crumbling, and a faint dark stain has appeared on the bathroom ceiling below. You scrub the corner. You buy a tube of white caulk. You smear it over the crack. The corner looks fine for a month, and then it does it again.
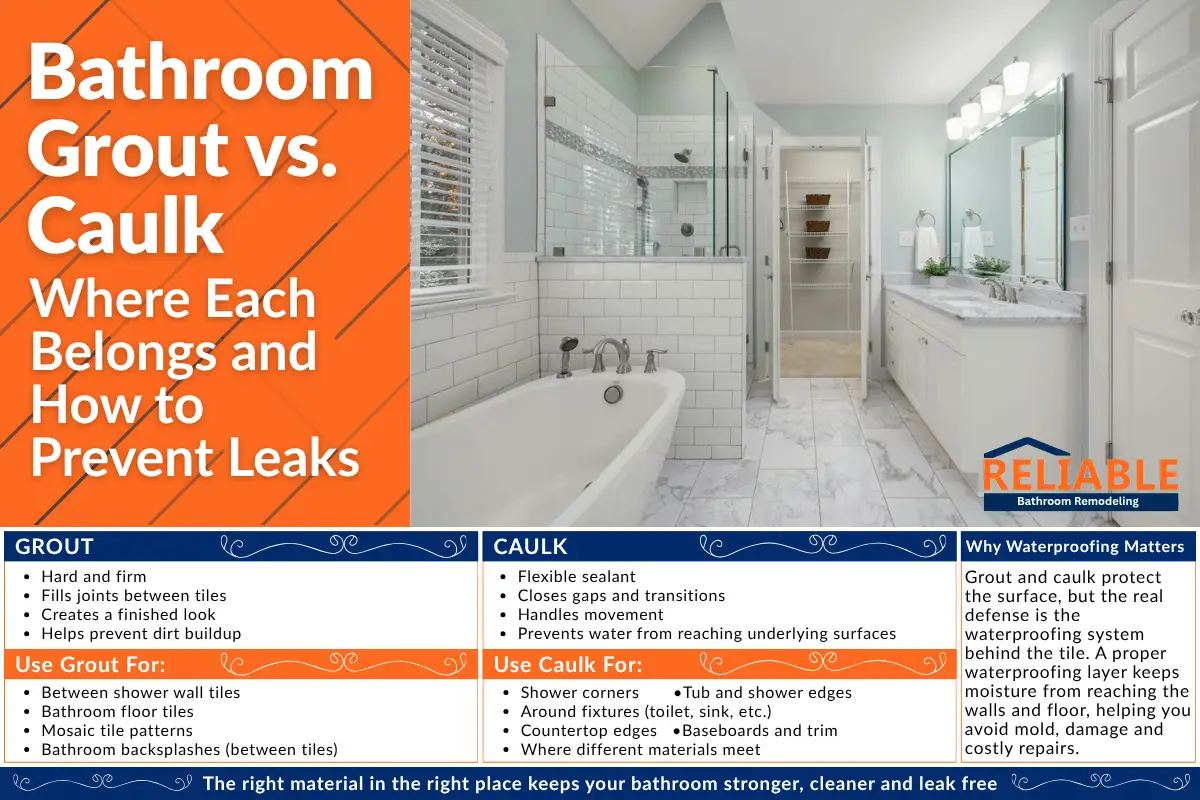
That cycleis one of the most common bathroom repair problems, and it usually comes from one mistake: using the wrong material in the wrong joint. Understanding grout vs caulk in bathroom applications is essential because these materials may look similar from a distance, but they serve very different purposes. Grout fills joints between tiles, while caulk seals corners and changes of plane where movement is expected.
This guide explains the difference, shows exactly where each material belongs, covers which type of caulk to buy, and shares a simple maintenance routine to help prevent water leaks and costly bathroom damage. Sources were checked in November 2026
.
Quick answer
Grout fills the narrow joints between tiles in a flat surface. Caulk, specifically a flexible sealant such as 100% silicone, belongs in corners, at the tub or shower pan, and anywhere tile meets a different surface. The tile industry’s movement-joint guidance (TCNA EJ171, via the NTCA Technical Team answer in Tile Letter) calls for flexible joints at inside corners, because rigid grout cracks when the building moves. Neither grout nor caulk is the real waterproofing in a shower, so the way to prevent leaks is to use the right material in each joint and inspect it twice a year.
The difference in one minute
Grout is a cement-based or epoxy filler that is packed between tiles. It is hard and rigid once cured. Its jobs are to fill gaps, lock tiles in place visually and keep dirt out of the joint. Caulk is a flexible sealant that stays elastic after it cures. Its job is to bridge a gap that moves.
Why does movement matter? A house is never fully still. Wood framing swells with humidity and shrinks as it dries, and temperatures change. A shower adds hot, wet air several times a day. Hard materials cannot stretch to follow those changes, so a rigid joint in the wrong spot cracks. A soft joint in the right spot simply flexes.
| Grout | Caulk (flexible sealant) | |
|---|---|---|
| Texture once cured | Hard and rigid | Soft and flexible |
| Typical home | Joints between tiles in a flat wall or floor | Corners, edges, and changes of plane |
| Weakness | Cracks where there is movement | Can shrink, peel or grow mold over time |
| Typical life | Long if sealed and not stressed | Often 5 to 20 years, depending on type and care |
| Repair | Rake out and re-grout | Cut out completely and re-apply |
Where each one belongs
The rule that tile professionals follow is simple. In a technical answer published by Tile Letter, the NTCA Technical Team answer in Tile Letter says that ANSI A108.01 section 3.7.4 covers sealing expansion joints, that TCNA Handbook method EJ171 describes where movement joints are needed, and that movement joints are needed at changes of plane, specifically inside corners in interior work. The best material for those joints is a flexible sealant that meets the ASTM C920 rating, commonly a 100% silicone product.
| Location | Use | Why |
|---|---|---|
| Flat tile field, between tiles | Grout | Small, stable joints that do not need to flex |
| Inside corners, wall to wall | Silicone caulk | Change of plane, where movement is greatest |
| Wall to floor or wall to shower pan | Silicone caulk | Different materials move at different rates |
| Where tile meets the tub or a shower base | Silicone caulk | Tubs flex and shift when filled |
| Around valves, shower heads, niches and seats | Silicone caulk | Changes of plane and penetrations |
| Where tile meets another surface, such as a door threshold or a different floor finish | Silicone caulk | Perimeter joints, per the movement-joint guidance |
| Drain strainers | Per installer | EJ171 as quoted by Floor Trends does not require a movement joint at strainers |
If you see grout in a corner or along the tub, that is a likely failure point. Stone World says plainly that grout placed in a joint subject to movement will crack. Floor Trends adds that an inside corner that was grouted and then covered with a thin skim of silicone still cracks, and that the better fix is a clean joint filled with a backer rod and 100% silicone.
A tip for new showers
If you are building or remodeling, ask your tile installer to leave the corners and the tub joint ungrouted so they can be filled with a color-matched silicone. It is a normal practice that gives the best long-term result.
Choosing grout
- Cement-based grout: the most common, available as sanded for wider joints and unsanded for narrow ones. It is porous, so it should be sealed. Check your grout’s label for when to seal and how often to reseal, since products differ.
- Epoxy grout: dense, stain-resistant and water-resistant, and it usually does not need sealing. But it is also rigid. a tile contractor writing in a trade article explains that epoxy cures hard and is not designed for movement joints, so it still does not belong in corners.
- Colors: lighter grout shows dirt faster. A mid-tone color hides everyday wear, and many people find it easier to live with.
Whichever grout you pick, remember its role. It fills the joints between tiles. It is not the waterproof layer, and it should not be asked to do the work of a flexible seal.
Choosing caulk
The aisle is confusing, so here are the common types and where each fits.
| Type | Strengths | Limits | Typical bathroom life |
|---|---|---|---|
| 100% silicone | Waterproof, flexible and long-lasting. Best for wet joints. | Not paintable, harder to tool and clean up | About 5 to 20 years (GE Sealants) |
| Silicone and hybrid blends | Easier to work with than pure silicone, some are paintable | Not always as flexible or durable | About 5 to 15 years (GE Sealants) |
| Acrylic latex (painter’s caulk) | Easy to apply, water cleanup, paintable | Can shrink and crack over time, less suitable for constantly wet joints | About 2 to 10 years (GE Sealants) |
Angi also says silicone lasts longer than acrylic, and that acrylic works better indoors where environmental stress is minimal. For the wettest joints, such as the tub-to-tile line and shower corners, a 100% silicone labeled for kitchen and bath is the common choice. Look for a mildew-resistant formula. Lifespan numbers are manufacturer estimates, and real life depends on humidity, cleaning and how well the joint was prepared.
Cure time matters when you are using the shower daily. GE Sealants FAQ says its kitchen and bath silicone is water-resistant in as little as 30 minutes and cures within 24 hours, and Bob Vila reports that for latex products 24 hours is also recommended before water exposure. Many pros still advise 24 hours, even for fast-curing products, so check the label for your product.
Why showers leak and how caulk fits in
Here is a point that surprises many homeowners: neither grout nor caulk is the main waterproofing in a shower. Water passes through grout, and caulk is a seal at the surface. The actual waterproofing is a membrane or coating behind the tile. Manufacturers such as Schluter give specific wait times for their membranes before tiling and water testing, because the system underneath is what keeps water out of the wall.
So why does caulk get so much blame? Because it is where the surface joints are, and failures there let water reach the wall behind the tile faster than it should. Common leak paths include a cracked corner, a peeled bead at the tub edge, a gap around a valve, and grout that has absorbed water for years. If water gets behind the tile and the membrane is damaged, hidden rot and mold can follow.
- Fix cracked or missing caulk quickly, since small gaps let water behind the tile.
- Keep the exhaust fan running during and after showers to reduce moisture.
- Wipe or squeegee the shower after use if you can.
- Look for early signs of trouble: staining on the ceiling below, soft spots, hollow-sounding tiles, a musty smell or peeling paint near the shower.
How to replace old caulk
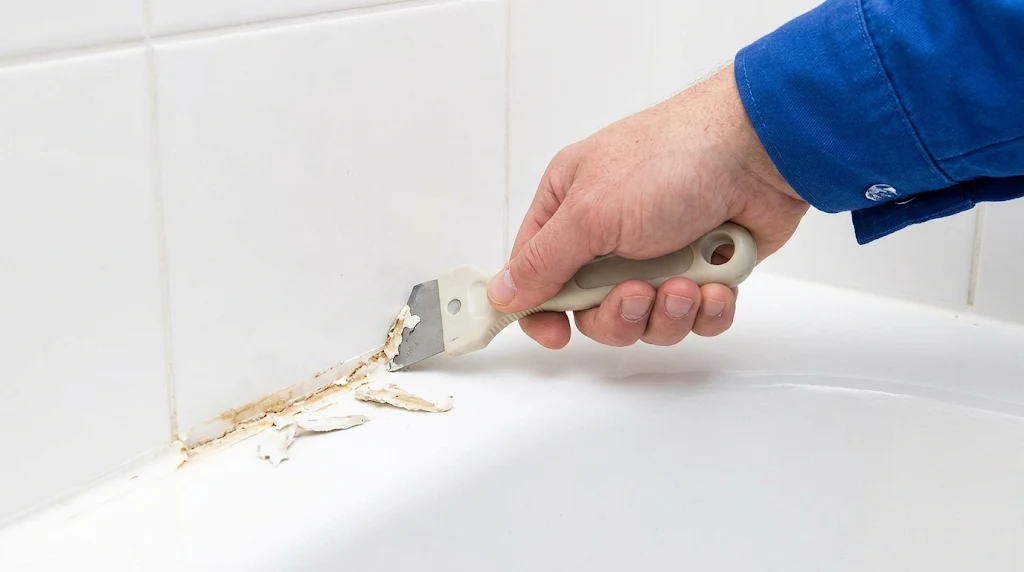
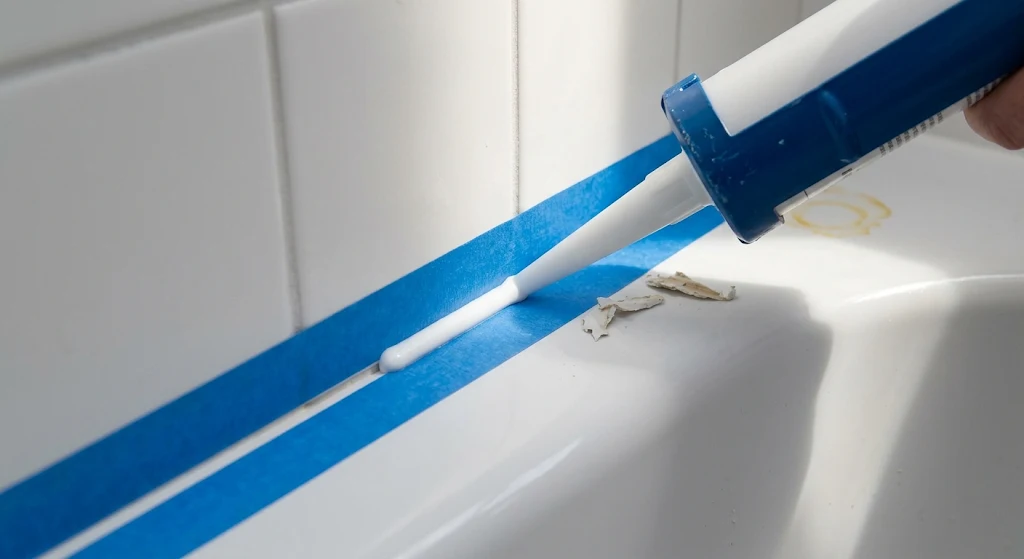
Recaulking is one of the best low-cost jobs in a bathroom. A tube is inexpensive, one how-to guide puts it at roughly $10 to $20, and the work takes an afternoon. The main trick is patience. Follow this order:
- Cut and remove the old caulk completely. New caulk does not bond reliably to old caulk, so a caulk-removal tool and a utility knife help.
- Clean the joint with rubbing alcohol. If there is mold, remove it and let the area dry. GE says never to seal over active mold and to let the area dry for 24 hours.
- For joints deeper than about 1/4 inch or wider than 1/2 inch, GE says to use a backer rod so the sealant does not sink or crack.
- Tape both sides of the joint with painter’s tape for a straight line.
- Cut the nozzle small, apply one continuous bead, and tool it smooth with a caulk tool or a damp finger.
- Pull the tape while the caulk is still wet.
- Let it cure for the time on the label, commonly 24 hours before any water.
For help with the bigger picture of tile and shower work, see the tile and shower work overview. And if you want to see how tile and corner details look when finished, browse tile work in finished showers.
A simple maintenance schedule
| Task | How often | Notes |
|---|---|---|
| Look over grout and caulk for cracks, gaps and mold | Every 6 months | Pay special attention to corners, the tub edge and around the valve |
| Clean grout and caulk lines | Weekly to monthly in a shower | Use a pH-neutral cleaner and avoid abrasive pads |
| Re-check and reseal cement grout | Per grout and sealer label | Many installers suggest yearly in showers, less often on floors |
| Replace caulk | When it fails, often 5 to 10 years | Replace sooner at the first crack, peel or mold that will not clean |
The intervals above come from general how-to guides and manufacturers. Always follow the label of your own products. The most useful habit is the six-month look, since it catches small gaps before they become leaks.
Common mistakes and myths
| Mistake or myth | What is true |
|---|---|
| “Grout in the corner is fine if I seal it.” | Sealer does not make grout flexible. Corners need a flexible joint. |
| “I can caulk over old caulk.” | Remove the old caulk first, because the new bead will not bond well to it. |
| “Epoxy grout never fails, so it works in corners.” | Epoxy is rigid, so it can crack or debond at movement joints. |
| “Any white caulk is fine.” | Use a 100% silicone or kitchen-and-bath product for wet joints. Painter’s acrylic is better for dry areas. |
| “Caulk waterproofs the shower.” | It seals surface joints. The waterproofing system sits behind the tile. |
| “Wipe it with bleach and it is fixed.” | Mold on failing caulk usually means the caulk should be replaced, not just cleaned. |
When to call a pro
Many caulk repairs are a good DIY project. Call a professional if you see signs of water behind the wall, such as soft or hollow tiles, ceiling stains below, a persistent musty smell, or grout and caulk that fail again quickly in the same spot. Repeated failures can point to a bigger problem, such as movement in the framing or a damaged waterproofing layer. For general maintenance questions, there is also a section of more homeowner Q&A, and if you are planning a bigger update, see repair and remodel budget ranges and the curbless shower design details for how floors and drains are handled.
Frequently asked questions
What is the difference between grout and caulk in a bathroom?
Grout is a rigid filler for the joints between tiles in flat areas. Caulk is a flexible sealant for corners, edges and places where two surfaces meet. Use grout where there is no movement and caulk where there is.
Should shower corners be grouted or caulked?
Caulked, with a flexible sealant such as 100% silicone. Tile industry guidance (TCNA EJ171) calls for movement joints at inside corners, and grout in those spots tends to crack.
Is silicone or acrylic caulk better for a shower?
Silicone is usually the better choice for wet joints. GE Sealants estimates 5 to 20 years for silicone and 2 to 10 for acrylic latex in bathrooms, and Angi says silicone lasts longer. Acrylic is easier to apply and paint, which suits drier areas.
How long should I wait before using the shower after caulking?
Usually 24 hours, though some fast-curing products are water-resistant sooner. Follow the label, because cure time varies by product and conditions.
How often should I replace bathroom caulk?
When it cracks, peels or shows mold that will not clean. Many guides suggest looking at it every six months and expect good silicone to last roughly 5 to 10 years or more.
Can I caulk over old caulk or mold?
No. Remove old caulk completely, clean the joint, and never seal over active mold. Let the area dry before applying new sealant.
Final thoughts
Grout and caulk are not rivals. They are partners, each doing a job the other cannot. Grout fills the flat joints. Caulk handles the moving ones. When each sits in the right place, a shower stays tight for years, and the only maintenance is a quick look twice a year.
If you remember one thing, make it this: never grout a corner. Use a flexible sealant, replace it when it fails, and keep an eye out for the early signs of trouble. If you would like to check which areas the company covers before asking about a repair or remodel, see the coverage areas. Sources checked November 2026.
Seeing cracks or stains in your shower?
Tell Reliable Bathroom Remodeling what you are seeing and ask for a free estimate. Share photos of the corners, the tub edge and any stains, and ask what needs repair and what can wait.